Between the Wasatch Range (a western range of the Rocky Mountains in Utah) and the Sierra Nevada
(mostly in California) there is the Basin and Range Province (some will
argue that that’s what the Wasatch is in). The Basin and Range Province is a vast
physiographic region that spans 500 miles from the Wasatch and the Colorado
Plateau to the Rio Grande Rift. A peculiarity of this region are the abrupt
changes in elevation, alternating between narrow faulted mountain chains (all in a North to South alignment) and desert flats. Edward Dutton, who
was a US Geologist in the 19th century, described these as “an army
of caterpillars marching toward Mexico". Some of these “caterpillars" are
(from East to West):
Oquirrh Mountains, UT, highest elev. 10,620 Flat
Top Mountain
Stansbury Range, UT, highest elev. 11,031 Deseret
Peak
Snake Range, NV, highest elev. 13,063 Wheeler Peak
Schell Creek Range, NV, highest elev. 11,883 North
Shell Peak
Ruby Mountains, NV, highest elev. 11,387
Ruby Dome
There are many more but this is not where I’ll expound on that. The
object of yesterday’s hike was Deseret Peak in the Stansbury and the reconnaissance
was for ski lines in preparation for a rturn this winter. We were in particular looking for three specific couloirs and a sense of the lay of the land in
general. We got a good sense of both.
The hike
The summer hike is best done through Mill Fork. Past the TH walk past the Wilderness sign, cross the creek (that may be dry) shortly after which you'll be at a trail intersetion. You will Pick Mill Fork to the left. You'll be doing about a mile, maybe a bit less, in the forest before you reach a large meadow. You will cross it and it will take you to a saddle at 10,042 feet. There you'll be at a t in the trail with left being Bear Fork and right being Deseret Peak. Follow the trail to the summit. For the return you can of course just go back the way you came or loop it via Pockets Fork. This second alternative is a bit longer than the out and back alternative.
The summer hike is best done through Mill Fork. Past the TH walk past the Wilderness sign, cross the creek (that may be dry) shortly after which you'll be at a trail intersetion. You will Pick Mill Fork to the left. You'll be doing about a mile, maybe a bit less, in the forest before you reach a large meadow. You will cross it and it will take you to a saddle at 10,042 feet. There you'll be at a t in the trail with left being Bear Fork and right being Deseret Peak. Follow the trail to the summit. For the return you can of course just go back the way you came or loop it via Pockets Fork. This second alternative is a bit longer than the out and back alternative.
The whole hike (done as a loop) is about 8.4 miles and a bit over 4,300" elevation gain in all.
NOTE: There is some confusion online and I believe on the ground on some of the signs at the mountain in the naming of South Willow Fork and Dry Lake Fork. In all my posts, when marked, I always go by the USGS names. In this case the USGS name for the fork that constitutes the basin at the north of the peak is Dry Lake Fork.
Ski lines
Ski lines
The couloirs we were looking for are the East Twins and the North couloirs (see below). In terms of what skiers look for these couloirs are not named right. The Esat Twins are north facing and the "North" couloir is Esat facing. These distinctions will matter when time comes to assess snow quality expectations. We noticed quite the uptic in winds around the entrances of these couloirs and since there is no reason that will change in winter, there is a good chance the entrances wil be pretty windloaded.
Our winter ski route up will most probably (depending on conditions) be up Dry Lake Fork and a bootpack up the couloirs. Again, depending on conditions, either Dry Lake Fork or Mill Fork can be good candidates for the ski out.
Driving directions to the trail head (from Salt Lake City)
- Follow I-80 to (exit 99) named for Tooele/Stansbury
- Go south on Highway 36 for 3.5 miles
- Take a right on State Road 138 and follow for 11 miles to Grantsville
- Take a left on West Street at the end of town, this road will become Mormon Trail Road
- Drive 5 miles south from Grantsville to a sign for South Willow Canyon (careful here: About two miles before this sign, there is a sign for North Willow Canyon and I learned the hard way that when it comes to directions 2 out of three correct ain’t good enough…)
- Take a right and follow this road which becomes gravel near the national forest boundary
- Go to the end of the road at the Loop Campground and trailhead
The Loop Campground is the one at the trailhead. If you decide to camp it’s
a good alternative as you can wake up and start hiking right from it. If
however you are pickier and want your campsite on the creek then you’ll have to
pick one of the lower ones such as Narrows.
In terms of facilities the Loop campground has a vault toilet and that’s
about it but it’s very pleasant. In 2015 the fee is $14/night for a site and one
car. You pay cash or by check using envelopes available at the entrance of the
camp.
Here are the pictures (click to enlarge):
 |
| The trail head at Loop Camground |
 |
| This is where you get off your ATV... |
 |
| Getting out of the woods... |
 |
| ...and into the Mill Fork meadow. |
 |
| You are out of Mill Fork, you are at 10,042" and you are taking a sharp right... |
 |
| ...up this trail. You have just another 1,000 feet of elevation to go. |
 |
| At about 10,400" looking South |
 |
| Our group on the move and closing in on the summit. |
 |
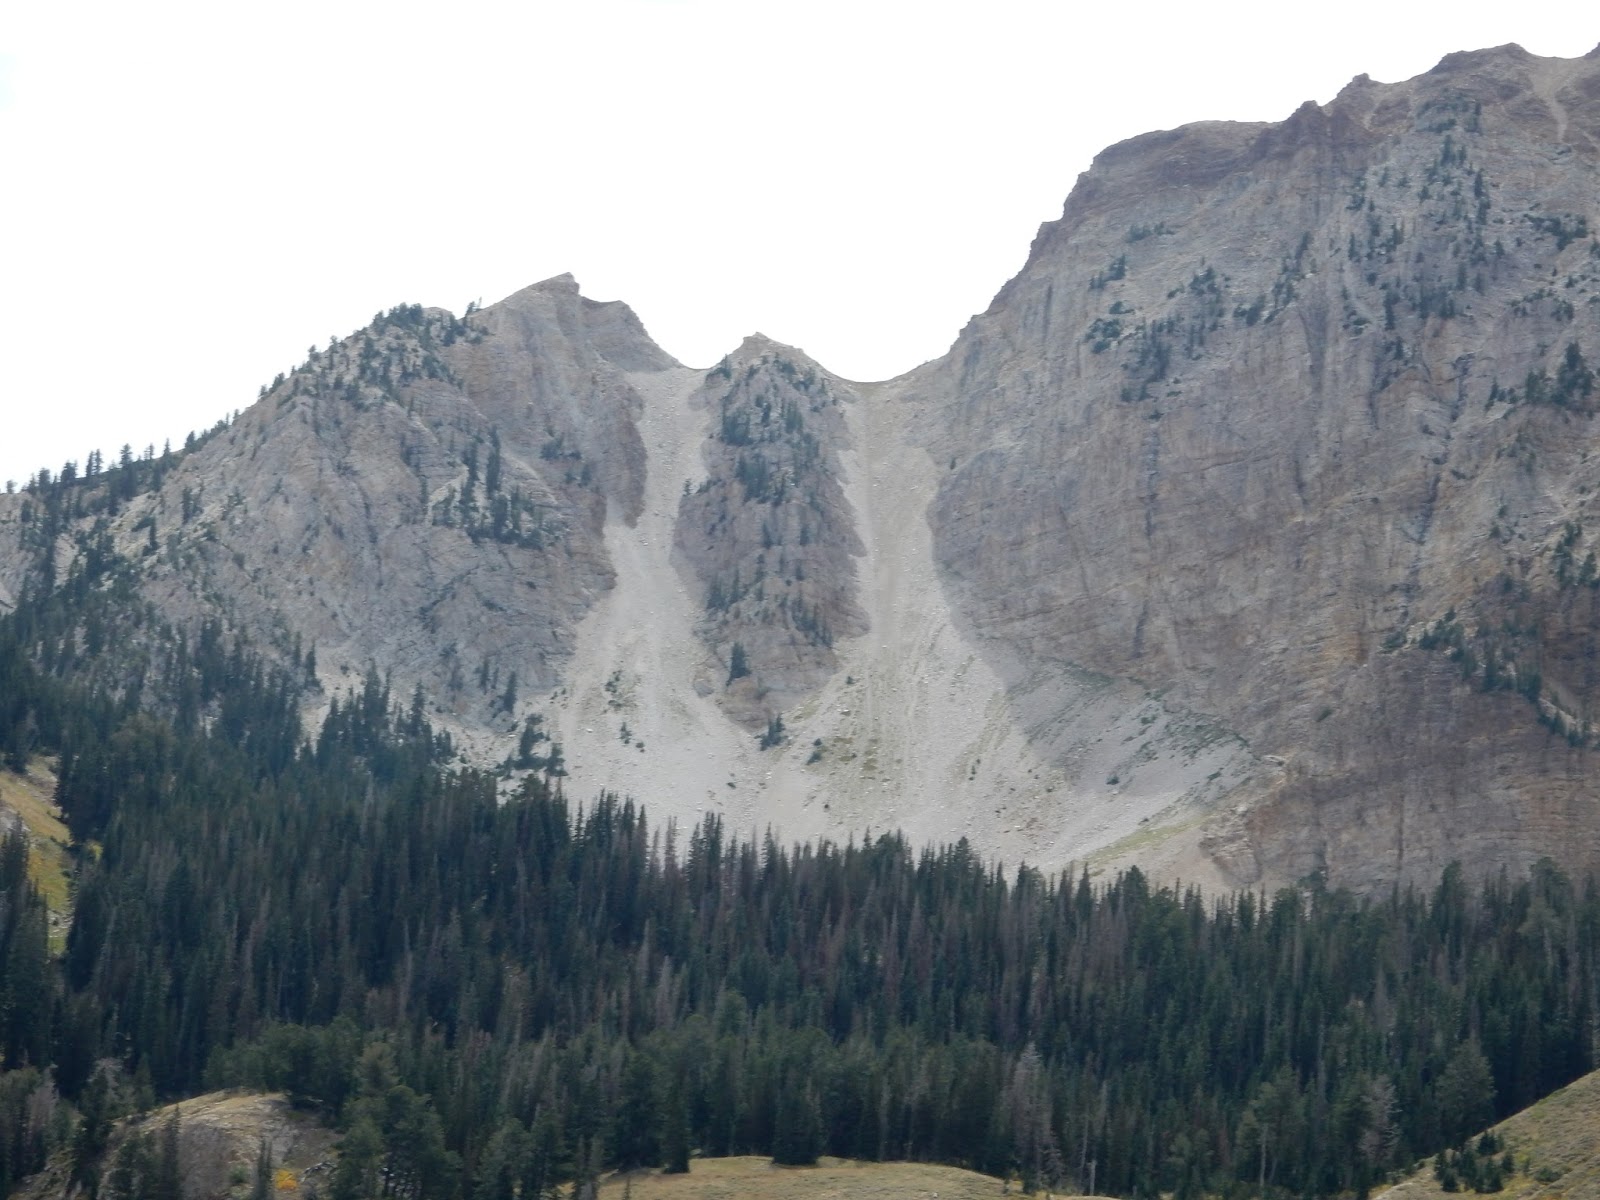
| Looking down the Eastern most of the twin couloirs. This is the narrower one of the two. |
 |
| Looking down the Western most of the twin couloirs. This is one is wider and both drop you down into Dry Lake Fork . |
 |
| The entrance to the Northern couloir. |
 |
| 1) Eastern most twin, 2) Western most twin, 3) North couloir |
 |
| Close-up of the twins. |
 |
| The Northern couloir as seen from Pockets Fork. |
 |
| 1) Approximate location of the TH, 2) Dry Lake Fork, 3) Mill Fork. |


